

Table of Contents
Mindee’s invoice parsing API makes the extraction of invoice details quick and easy. Our RESTful API takes an image or PDF of an invoice and extracts all of the pertinent details of the invoice. In under a second, it returns a JSON response with the extracted elements along with coordinates of their visual location in the document and the confidence of our ML algorithm. We’ve blogged on how to use the Invoice API with Curl, NodeJS, and Python.
We realize that this is just part of the invoice ‘process’ at your company. In this post, we’re going to extend the API further using Microsoft Power Automate. By creating a ‘flow’ for your invoices you can build automation connecting different Office 365 services to automate your workflows.
Robotica Process Automation (RPA)
RPA is using computers and automation to streamline mundane tasks. By reducing the number of time employees have to do simple and repetitive tasks, the employees have more time for high-value work – increasing productivity and reducing human errors that might occur during the process. The process described below certainly removes a lot of process steps to the invoice process, so it is an RPA.
Low Code/ No Code
Even better, this process also can be considered a low code implementation. There’s no need to pull one of your developers off a project to implement. Simply following these instructions (and having access to an Office 365 account), any member of staff should be able to add this automation step to the invoice process.
Complete Invoice Processing
Extracting the pertinent data from the invoice is a huge step in simplifying the processing of an invoice, but it is just one step in the required workflow. In today’s digital age, many invoices arrive via email and must be rescued from your inbox for processing. Then all the details must be entered into a spreadsheet (or another database) – all this before you actually *PAY* the invoice.
Many of these steps can be automated, and with Mindee’s Invoices API, the most tedious part (the data entry into the payment system) can be automated as well. If your company is using Microsoft Office 365, this automation can be done using Microsoft’s Power Automate flows.
In the following example, we’ll automate the process from email delivery to storing the invoice data into an Excel Online spreadsheet. Inside the workflow itself, we’ll save the invoice to a document library SharePoint Online, call the Mindee’s Invoices API and populate additional, custom columns in the SharePoint library and. A picture is worth a thousand words, so here is a diagram of the flow as we built it:
.webp)
Test the Flow
You can try this flow by sending an email to doug@riolinx.com (make sure you attach an invoice in PDF or JPG format). Microsoft Flows seem to run every 5 minutes or so, so you’ll soon see your invoice parsed and added to the Excel document. Feel free to try it out as often as you’d like!
While this is a fu example, it does not do a lot of good for your company’s invoices to end up in a publically available spreadsheet on the internet. You’ll want to create your own (private) version of this Flow for your company’s invoices. Read on to learn how:
Importing the Flow
The flow we created is available on Github. Download the “MindeeInvoiceswithMicrosoftFlow.zip” from the repository. (You’ll also need the invoice_excel.xlsx file in a bit, so you might as well download that now as well.).
To add the Flow to your Microsoft account, navigate to https://flow.microsoft.com and log in with your work credentials. You may have to create a free trial of Power Apps if you do not already have Flow/Power apps enabled.
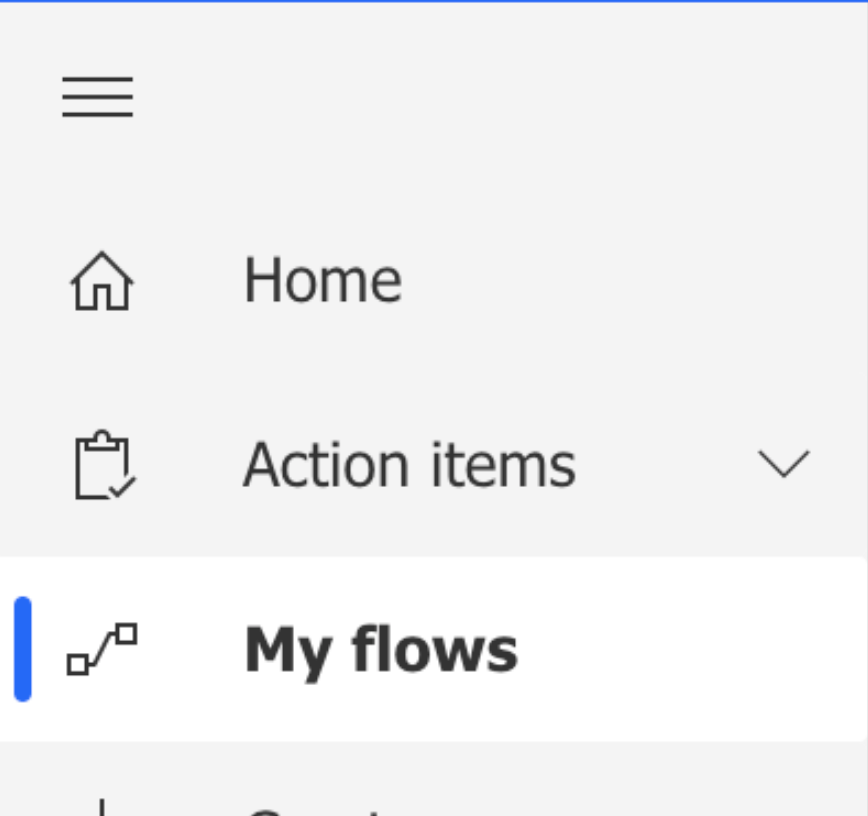
Click on the “My Flows” in the left navigation.
On this page, there is a link to import a flow:
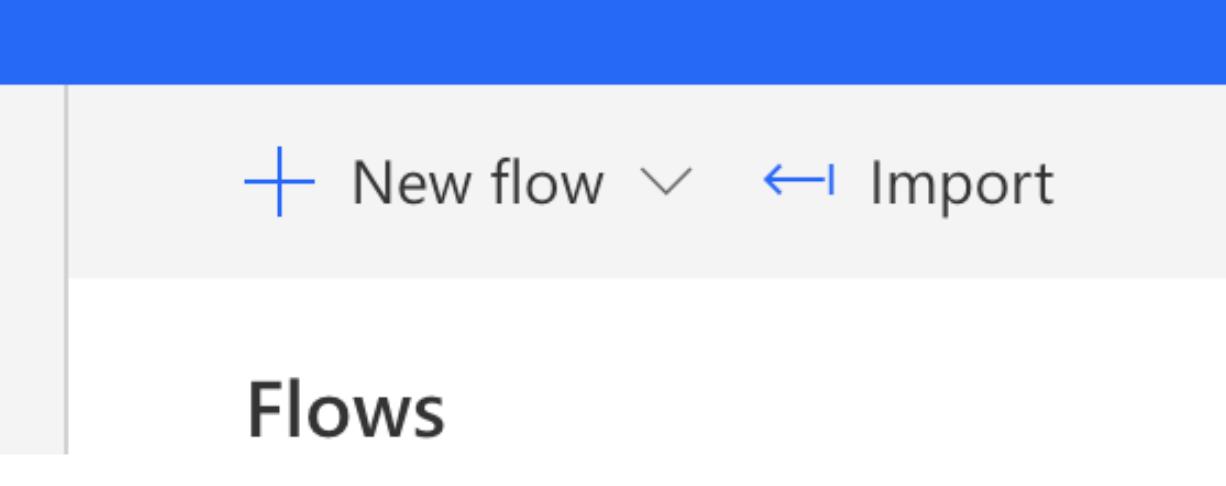
Click import to begin the upload of the Zip file. After the Zip file is uploaded, the page will ask you to name the flow and to connect it to your Outlook account. The connection is required in order for the Flow to have access to your emails.
Step 1: Under name – import setup – Create as new, and give the Flow a name that makes sense for your organization.
Step 2: Connect your Outlook – click “select during import.” In my case, I did not have a Flow connection set to Outlook, so I had to click “Create New” and connect to my SharePoint account. Clicking the refresh allowed me to add the connection:
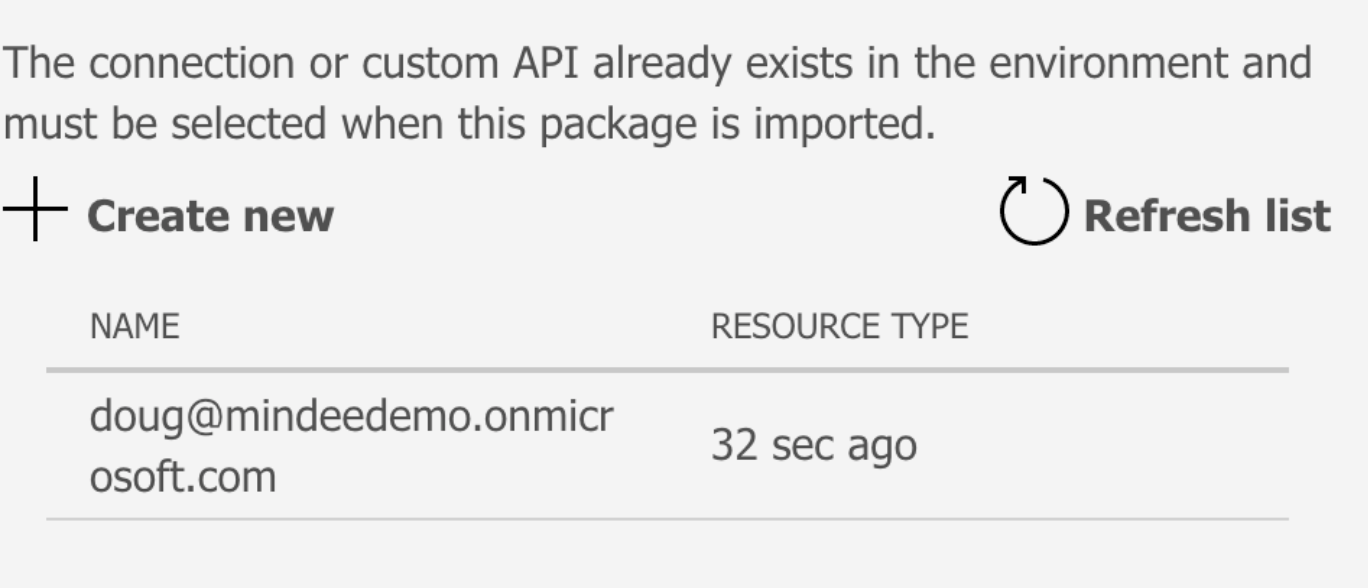
Here I am connecting to a new email address in a new Microsoft Flow account.
Now, once all the connections have been made, you can press the blue import button at the bottom of the page. After a few seconds, the package will import successfully.
Editing the flow
In order for this flow to succeed in your Office 365 environment, you’ll need to make a few edits. Head back to “My Flows” and select the Mindee integration and press the edit button.

Add your email account
The email account that receives invoices in your organization. In the flow, it is currently set to doug@riolinx.com – which does your organization very little good. We’ll need to update that:
Click the “On new email” and select advanced options:
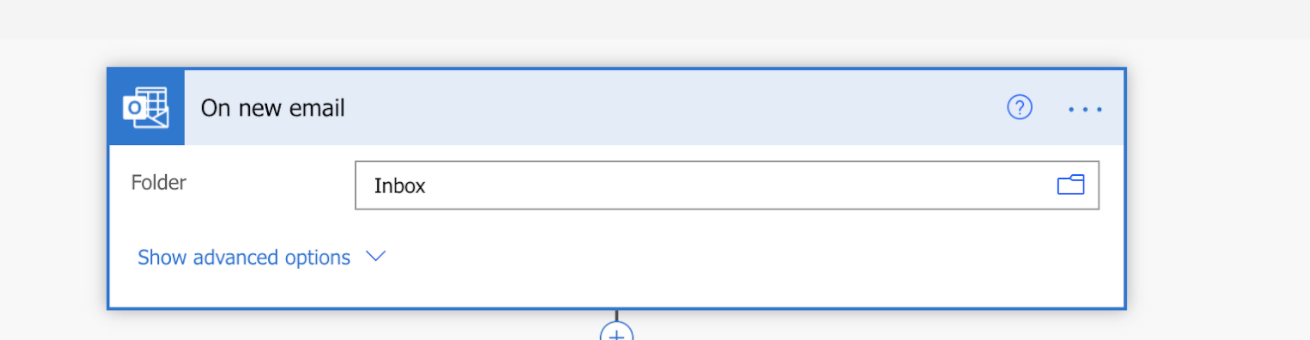
Now, edit the “To” field to correspond to the address that will be receiving invoices in your organization.
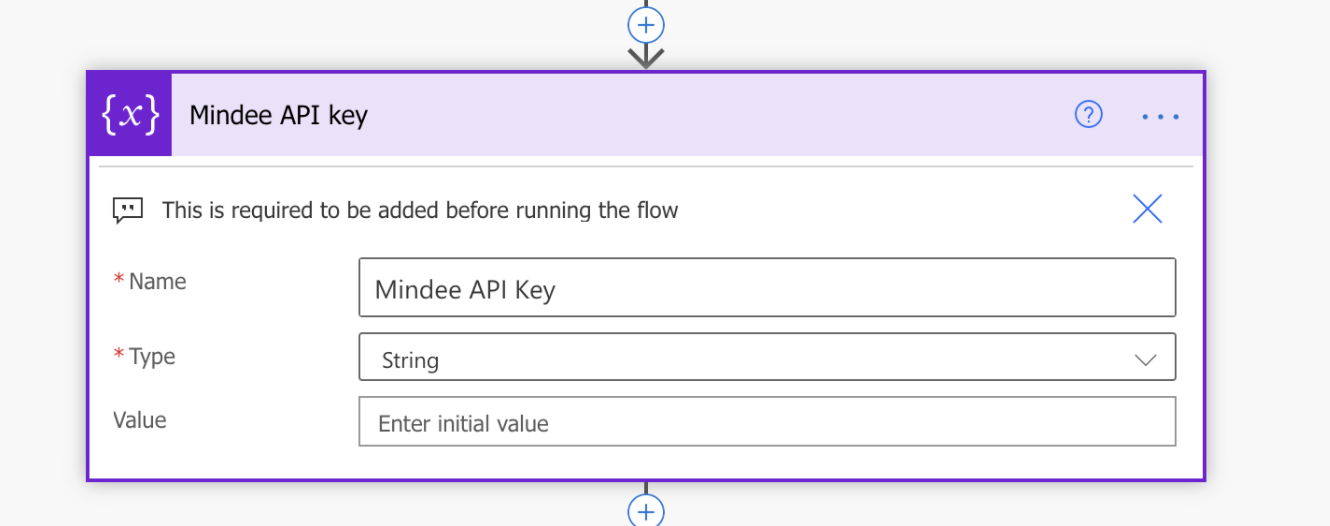
Mindee API Key
The next step in the process is your Mindee API Key. You’ll need to paste in your API key in the Value field. To obtain a Mindee Invoice API Key, visit Mindee.com and follow these steps to get your key.
Now you can save your Flow. To turn it on, head back to the main view of your flow, and select “Flow Checker”. You’ll see a warning that the flow is off – and a button to turn it on.
This will flag another warning – don’t worry – it is just telling you that the flow has never run successfully. Of course, it hasn’t – you haven’t had a chance yet!
Test it out
Send an invoice to the email address you configured in the flow (don’t forget to attach an invoice!). The Flow will run in the next few minutes, and you’ll see the successful run in your 28-day run history.
Clicking the date and time (in the 28-day run history table) allows you to check the status. If you scroll to the bottom of the Flow, you’ll see the “apply to each attachment in the email.” Open this, and then Open “Update Excel Online Spreadsheet”, and open one of the variables:
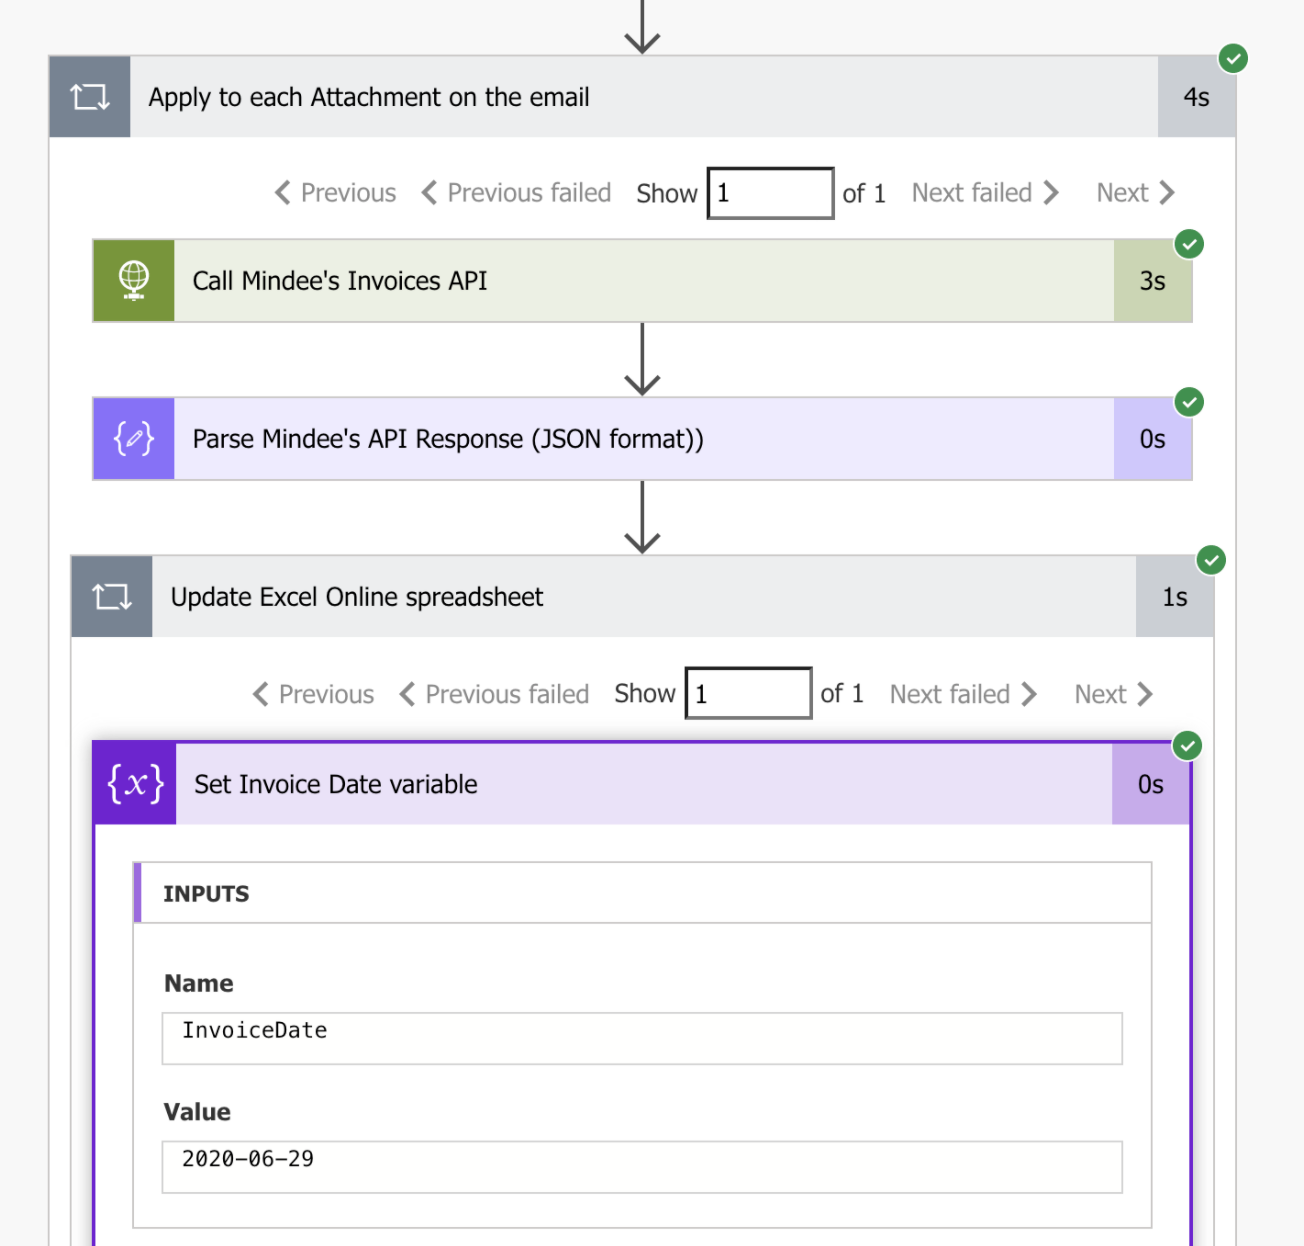
The screenshot above shows that the API correctly extracted the invoice date as 29 June 2020. This is super cool – as we now have a Flow that interacts with the Mindee API to extract data from submitted invoices.
But your Flow does not actually DO anything with that data yet. In the next sections, we’ll connect the flow to Excel and to SharePoint, and submit the data to these Office tools for future manipulation.
Connect an Excel Online Spreadsheet
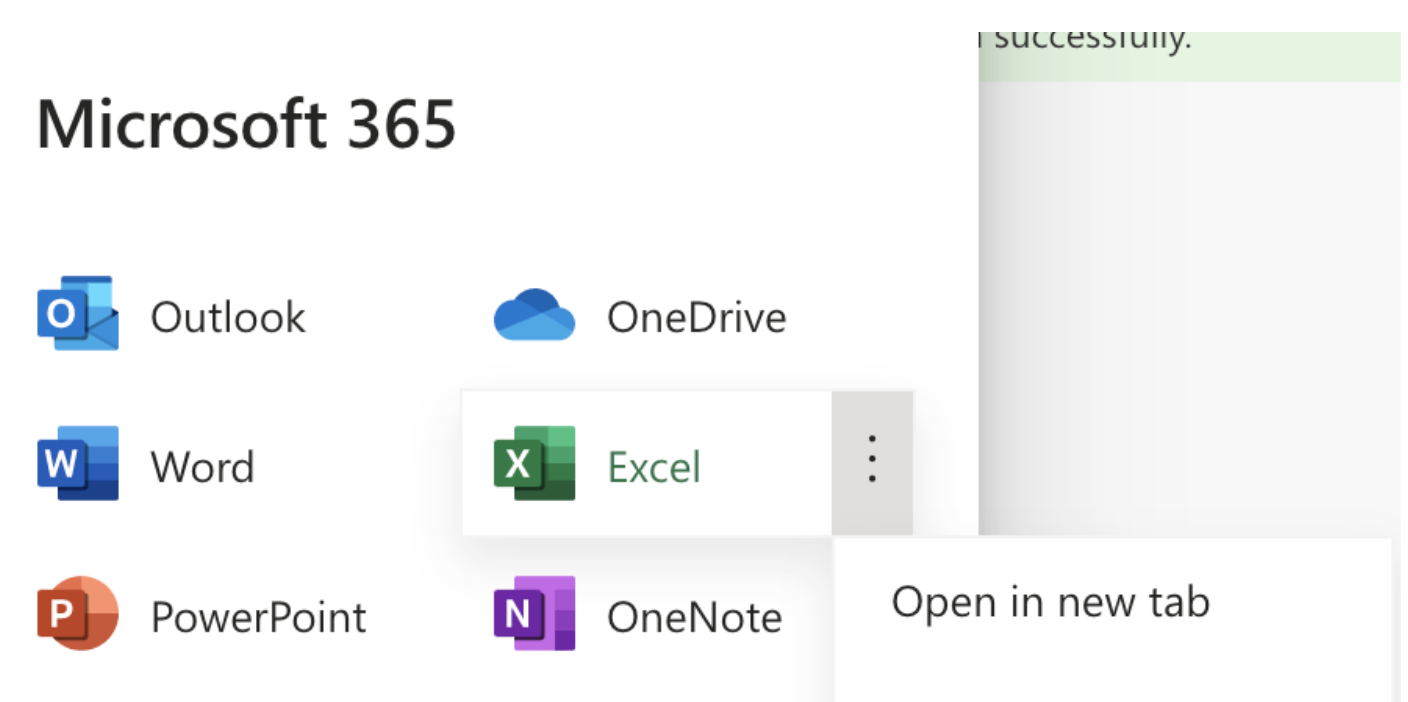
In the Github repo, there is an excel file: Invoice_excel. Upload this into your Excel Online account. To do this: Open Excel in a new tab:
Upload the file into Excel. It will open, and you’ll find an empty table with headers that look like they will intake invoice data. This table is named “invoices2021”
Connect the Flow to the Excel table:
Back in your Flow, click the edit button and open the “apply to each Attachment in the email” (at the bottom). Open the “Update Excel spreadsheet” entry and add an action at the bottom(the circle with a ‘+’ sign in it). We’re going to “add a row to a table”:
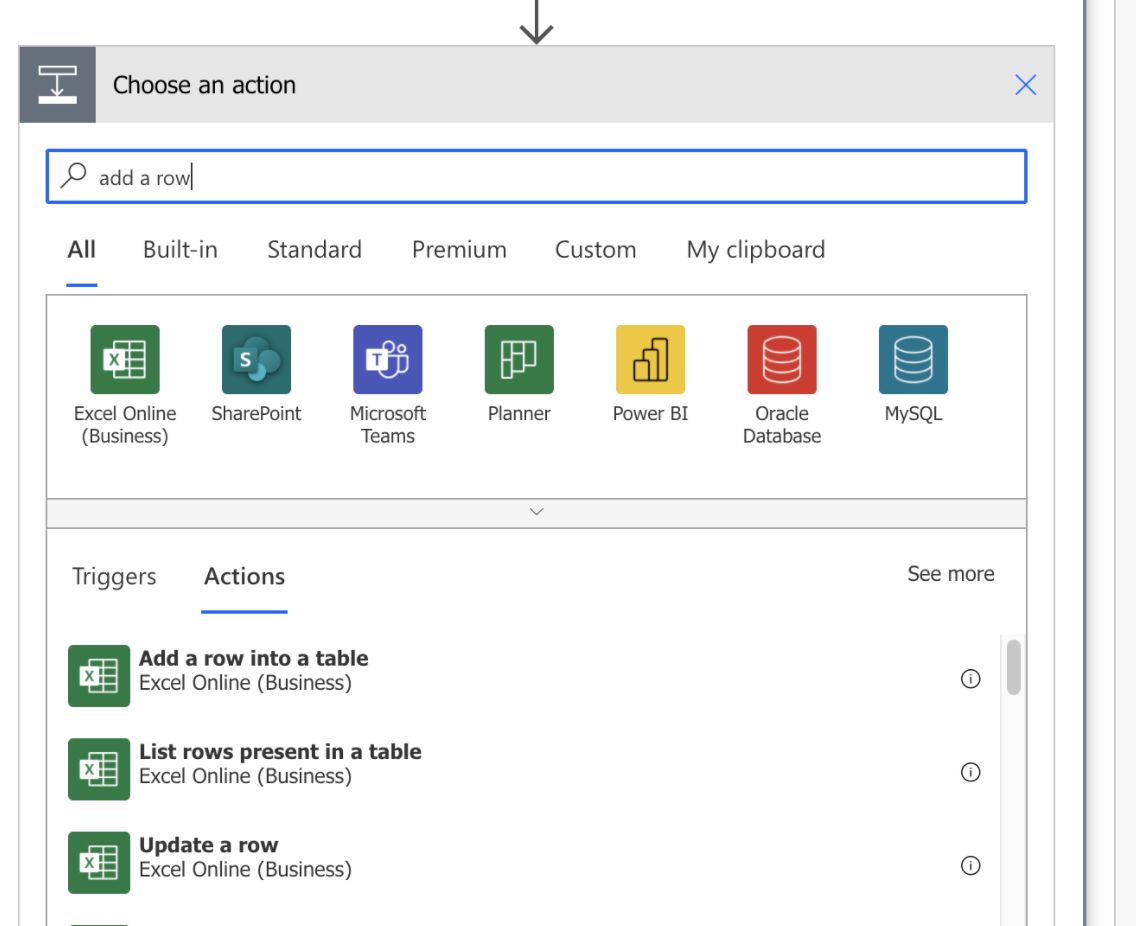
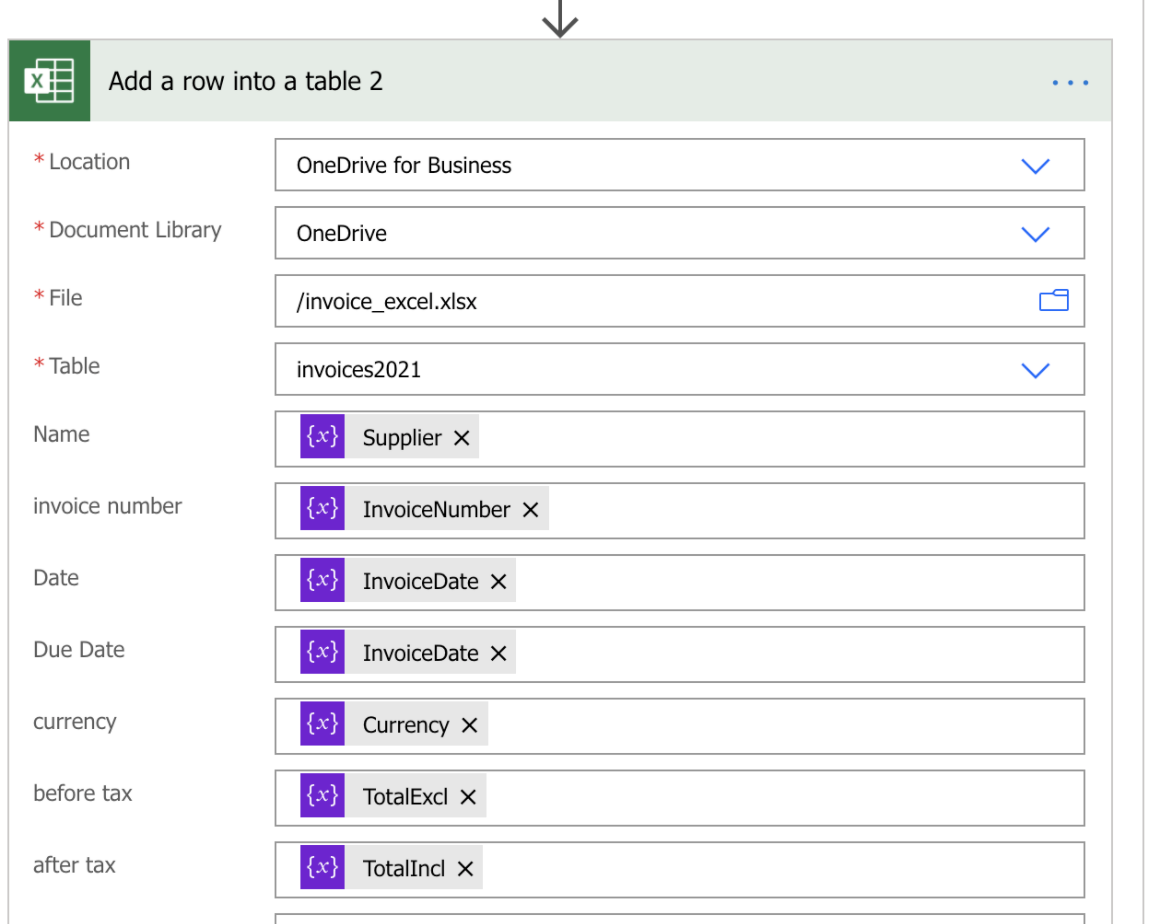
Choose the Invoice_excel file you just uploaded:

And the table is “invoices2021.” Now that this is added, all of the columns in the table will appear in the Flow. Add the variables that were assigned earlier by clicking each entry box in the form, and adding the dynamic variables as shown below (the purple dynamic entries correspond to the variables that exit the Mindee flow):
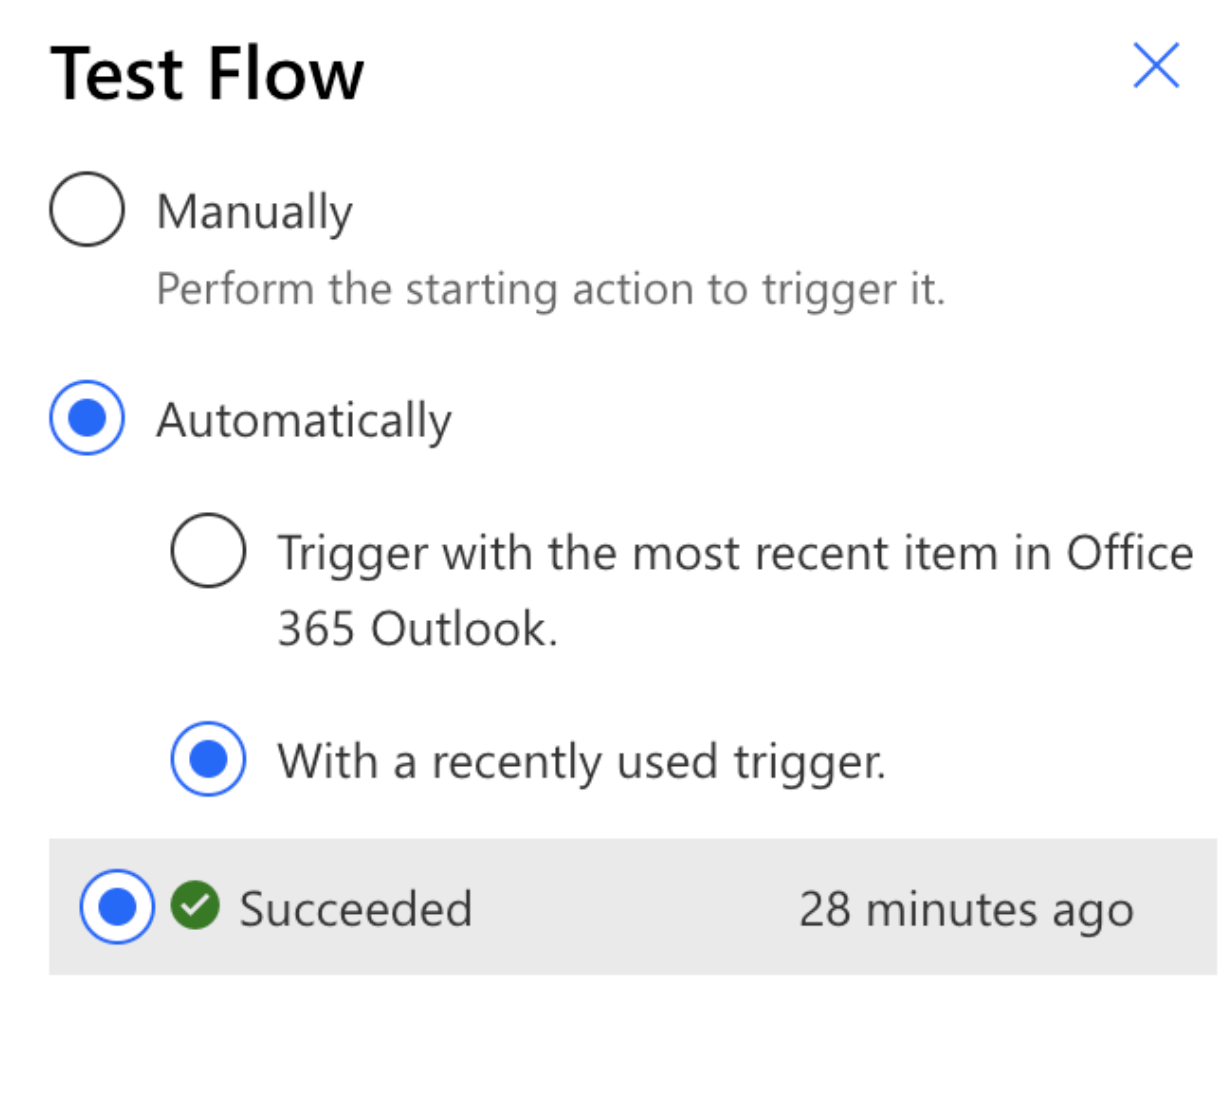
Click save, and test the flow. You can use the trigger you used in the initial test to run the flow immediately.
The difference is now that the invoice details are added automatically to the Excel file.

Yes!!!
Saving the file to SharePoint
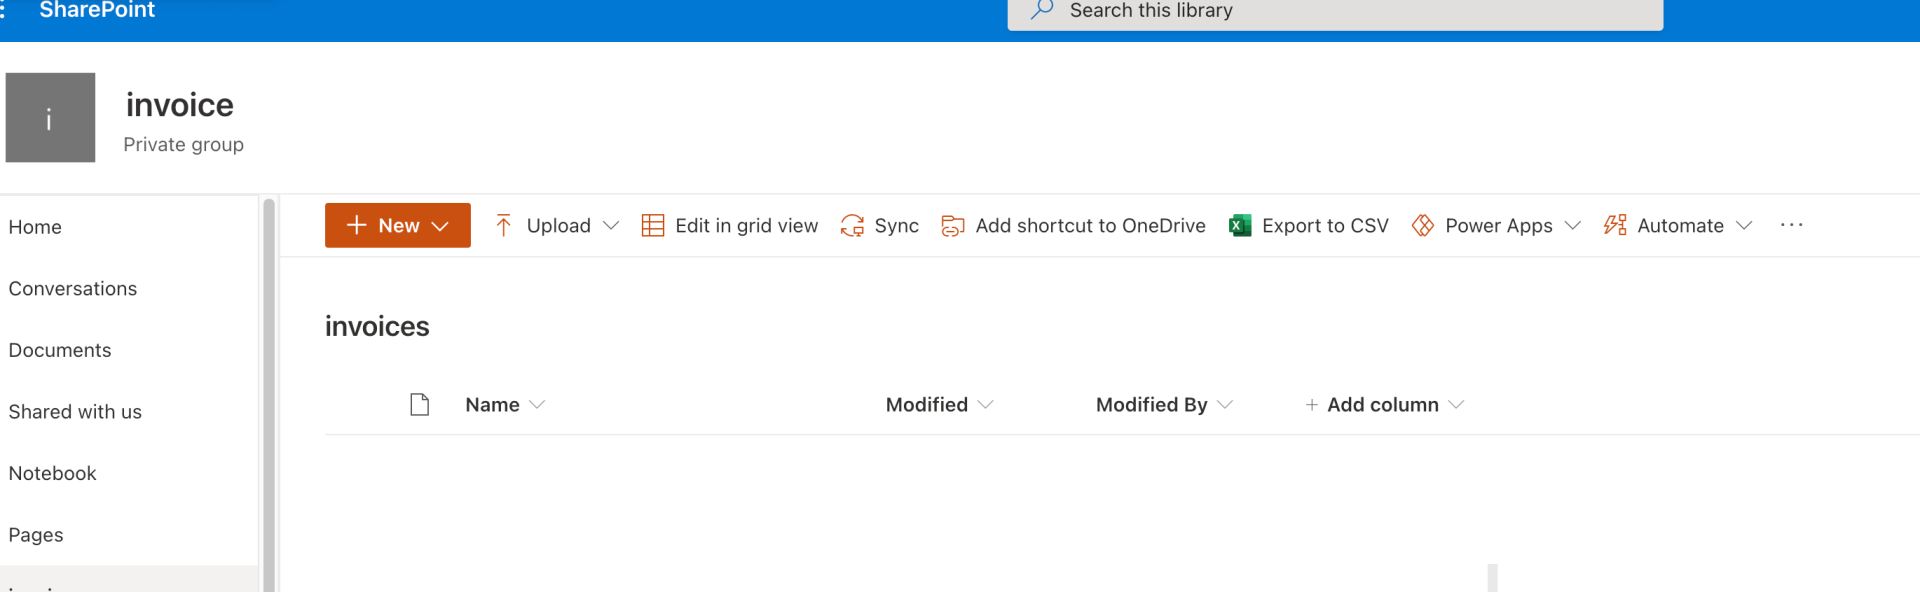
In My SharePoint site, I have created a new document library called “invoice”. When it is created, I land on a page with a table where my files will end up.
Looking at the column names, I see that I can add columns to my table! We can add the extracted Mindee data right into the SharePoint Table:
Clicking “add column” (note: always choose “single line of text” – in case of the API responds with a “N/A”) opens this dialogue:

For this example, I picked 4 variables: supplier name, invoice date, due date, and total due. I could have added more – it is up to you what data you want to appear here.
Connect the Flow to SharePoint
Now that we’ve created the library, we need to wire it to connect to our automated Flow.
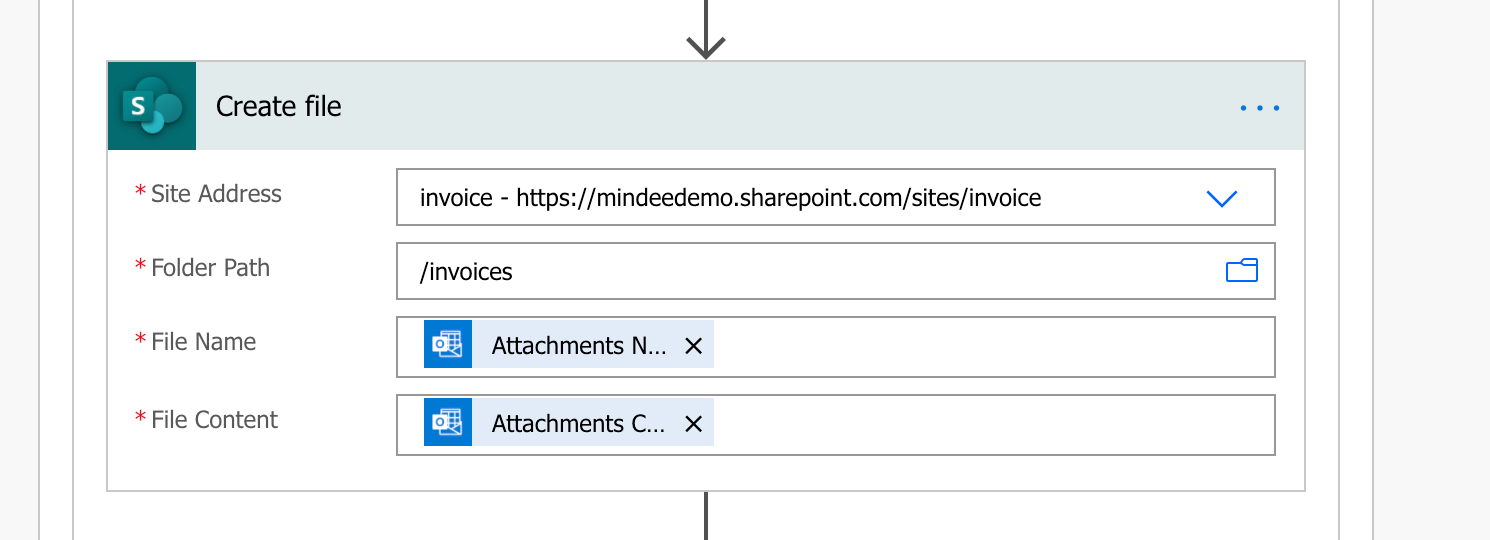
First, we’ll want to insert the file into the document library. So between the last variable, and before we add to the Excel table, insert a step Sharepoint: Create File:
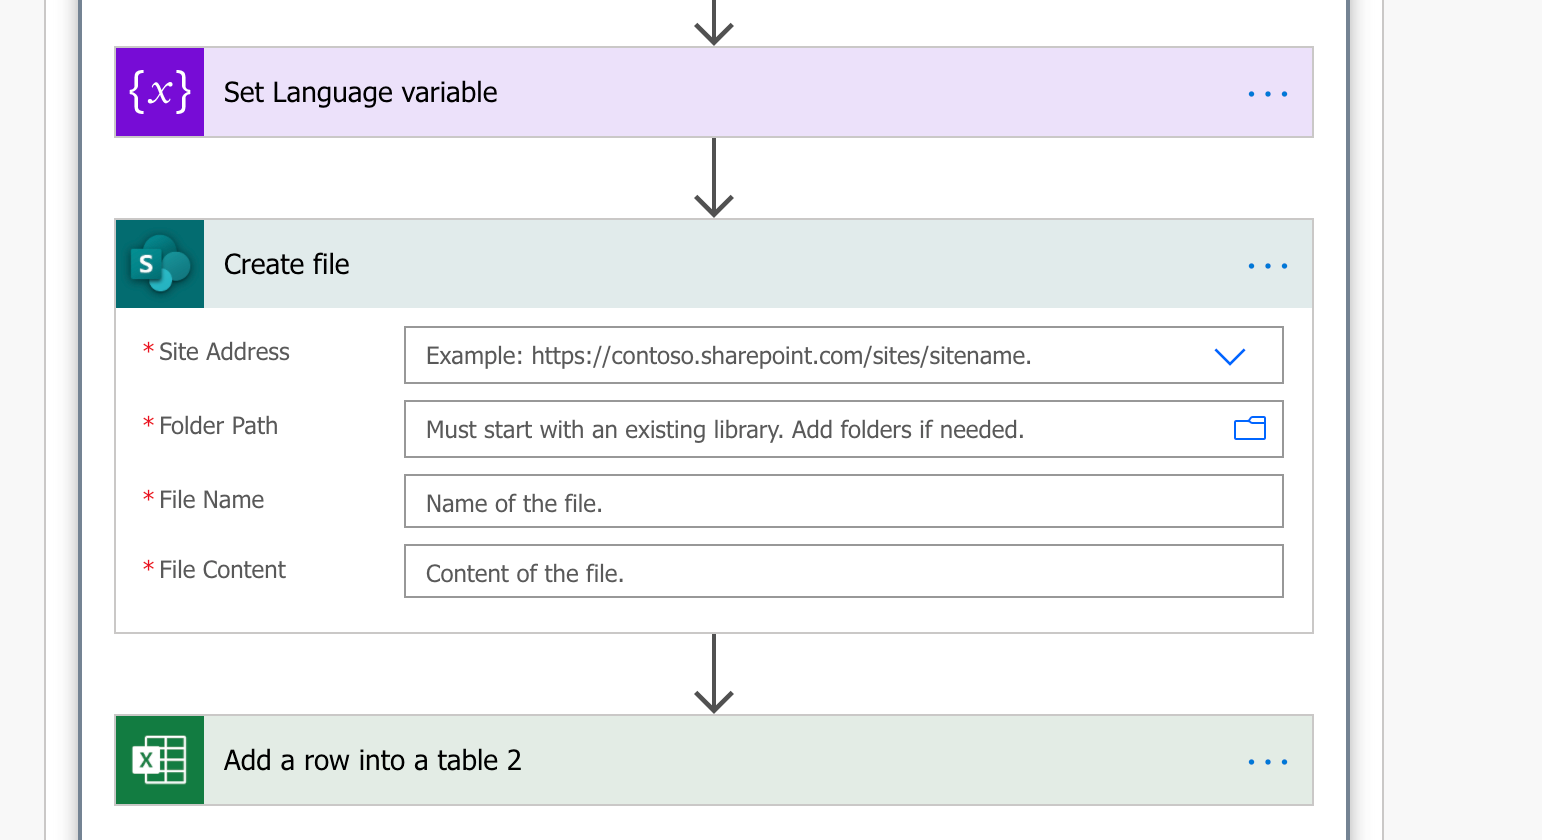
Fill in the form – the SharePoint and Folder path are your company’s SharePoint, and the library you just created for your invoices. Then use the dynamic variables to add the “Attachment Name” and “attachment contents” to the last two fields.
The file is now added, but to fill the new columns created in the library, we need yet another connector: SharePoint: Update File Properties:
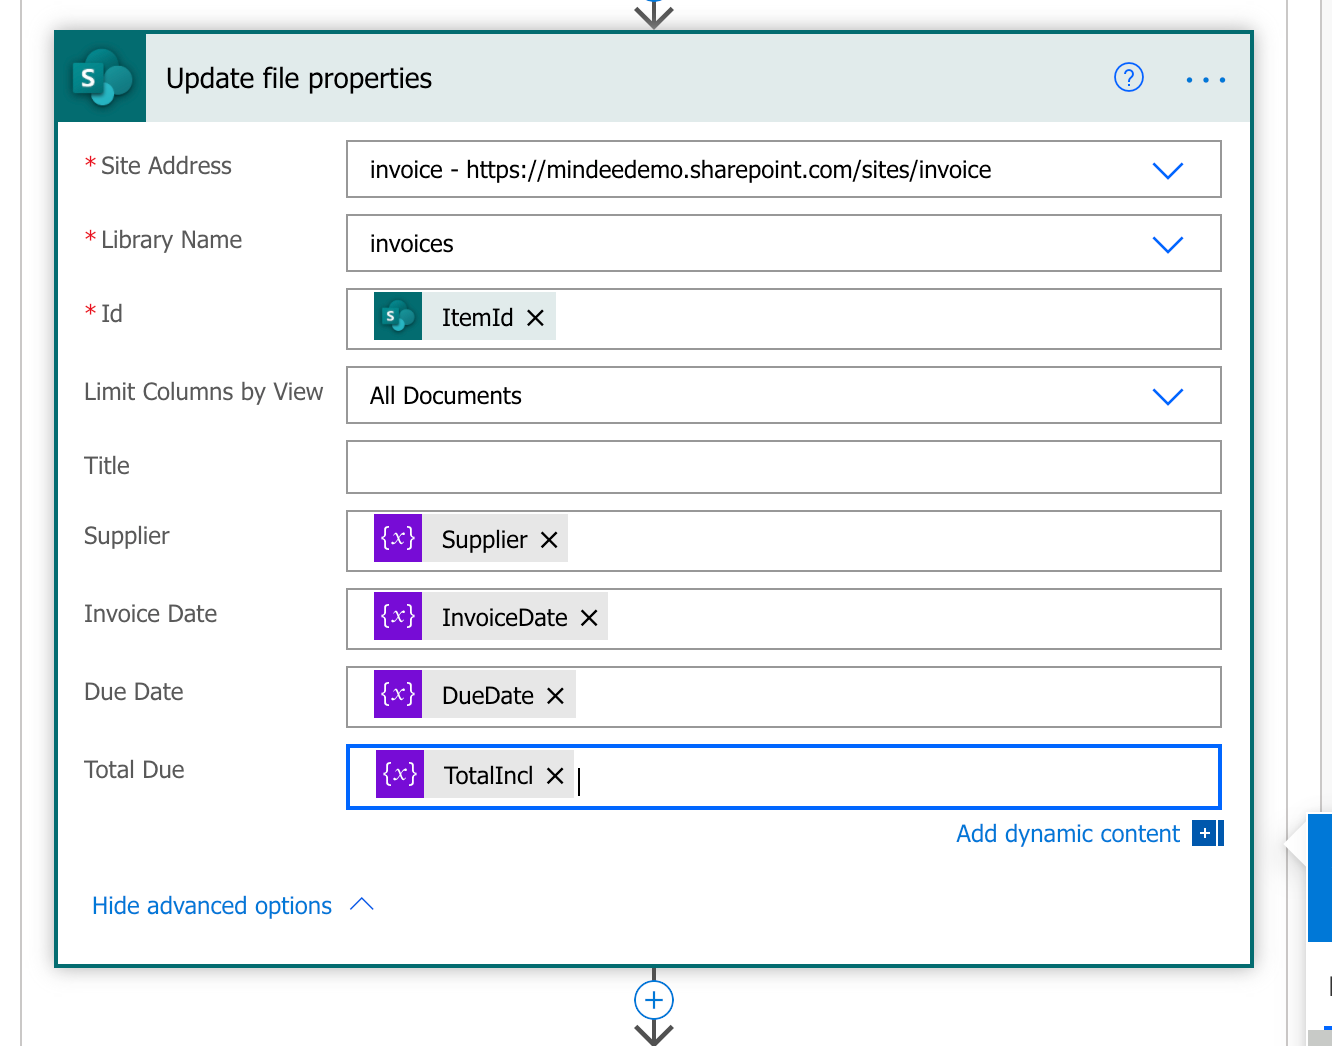
We again connect this to our new SharePoint Library. To specify which line we apply, choose ItemId – this refers back to the document we just created one step back. When you add the library name, it will find all of the columns, you added. Then we can use the variables from the Mindee Flow to fill out the columns of the SharePoint library, as shown above.
Adding the SharePoint Path to Excel
The Excel table has fields to help you find the file in SharePoint, so go back to the “add a row to excel: and insert the SharePoint Filename and path to the flow, and connect the dots between all the files and connections we’ve made with this flow.
Now we’re ready to save the whole flow, and test!
The test
Once we send an email to the account, we see that not only is the invoice added to the SharePoint Library, but the details are also added to the excel table (with the SharePoint file details in the Excel file):

Conclusion
To increase productivity, many organizations are using Robotic Process Automation and low/no-code tools to automate tedious and slow tasks. The processing of invoices is one such process that is readily suited for automation.
Using Mindee’s API to extract data from an invoice is just one piece of the invoice pipeline. In this demo, we’ve extended the use of the Mindee invoice extraction API with Microsoft Flow – taking an email attachment, saving it in SharePoint, and extracting the details as column data in SharePoint as well as creating a row in Excel.
With all of the tools inside Microsoft 365, this is just the tip of the iceberg – you could potentially integrate with any other product in the suite. Try out our Mindee Flow to extract data, and then use the variables to wire the data into your favorite Microsoft Project. If you have any questions (how to reach out, etc.)


