Blog
Tutorials

Extract receipt data with Mindee’s API using Python

Reading time:
6
min
Published on:
Sep 10, 2020

Jonathan Grandperrin

Jonathan Grandperrin

Summary

Share the article

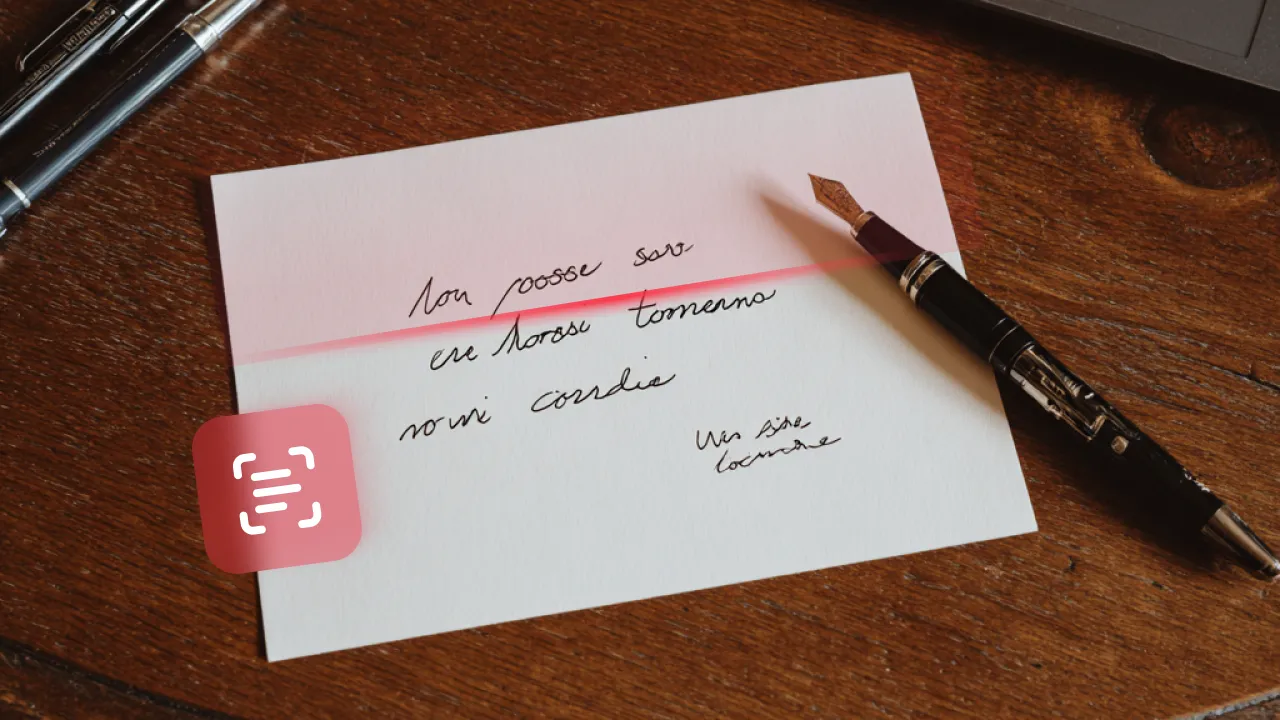
In this tutorial, you will learn how to parse a receipt image using python. This can help you automatically extract data from receipts without human interaction and use it in your backend applications for many accounting purposes.

The final script can be used within any python middleware application or REST API serving your frontend interfaces.

In the end of this tutorial, we’ll show you how to highlight the extracted receipt fields on the image using the open source computer vision library OpenCV.

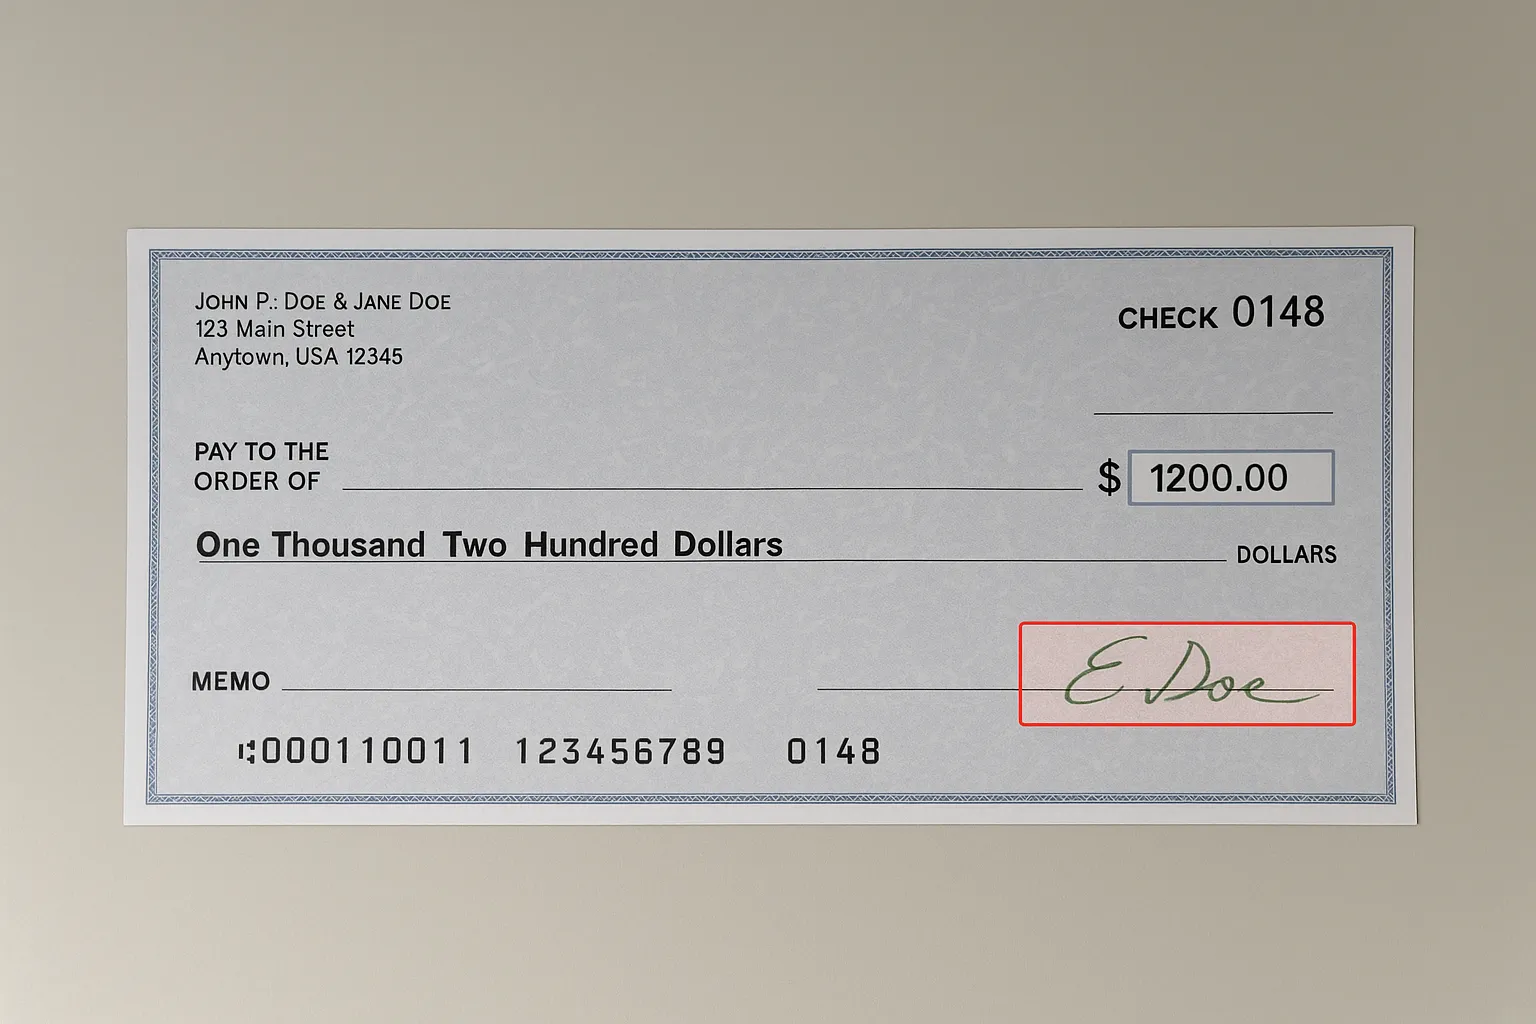
The final result looks like this:

API Prerequisites

  1. You need to have python installed in your environement. We’re using the 3.7 version in this tutorial.
  2. You’ll need a free Mindee account. Sign up and confirm your email to login.
  3. A receipt. Look in your bag/wallet for a recent one, or do a Google Image search for a receipt and download a few to test with.

Setup the project

Create an empty directory wherever you want in your laptop, we’ll call ours “python_receipt’, and create a ‘main.py’ file in it.

Open up a terminal and go to the directory you just created. In this tutorial we’ll use the python library “requests” to call the API. If it’s not installed in your env, you can install by running:

pip install requests

Make sure you have a receipt image somewhere on your laptop, and you know the path.

That’s it for the setup, let’s call the API.

Call the Mindee receipt API
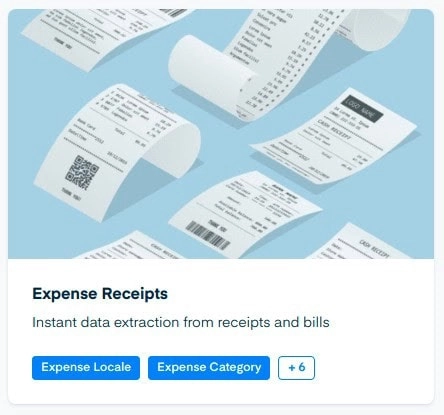
Login onto the platform.mindee.net and get into your Expense receipt API environment by clicking the following card.

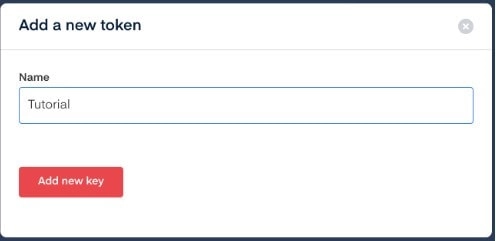
If you don’t have an API token yet for this API, go to the “credentials” section and create a new API Key.

Click on the documentation section in the navbar, and then click on the Python link on the sample code area. Copy the code.

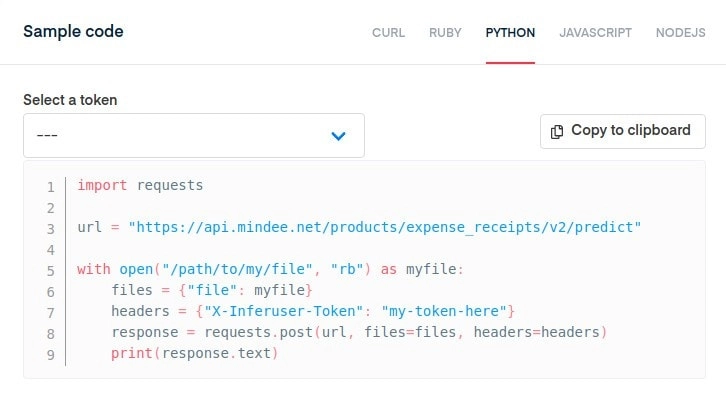
Open the main.py file you created a few minutes ago, and paste your sample code, it should looks like:

import requests
url = "https://api.mindee.net/products/expense_receipts/v2/predict" 
with open("/path/to/my/file", "rb") as myfile: 
    files = {"file": myfile} 
    headers = {"X-Inferuser-Token": "my-token-here"} 
    response = requests.post(url, files=files, headers=headers) 
    print(response.text)

Replace the “path/to/my/file” placeholder in the code with the path of the receipt image you want to extract data from.

Replace the “my-token-here” with the API token you created previously in the platform.

You can get back to your console and run the script

python main.py

You should see a json object in your console with the results extracted from the receipt parsing API. Now let’s parse this json to get the data we need.

Parse the result

The API extract a list of different fields in the receipt (total amount, taxes, date …). You can find a description of all o fthe fields in the “documentation” tab on Mindee API platform page.

Now that we coded the API request, we’ll use the json object and get a few extracted features.

First, let’s create a parsing function that returns the receipt total amount, the date and hour of the payment and the expense category. We’ll focus only on those four features for the tutorial.

The features are inside the prediction object in the json response. As you can send a multi pages pdf to the API, the predictions object is an array, with a prediction object for each page.

In our case, as we are sending a simple jpg image, the predictions array contains only one object.

def get_features(json_response):
    parsed_data = {}    
    prediction = json_response["predictions"][0]    
    parsed_data["total_amount"] = prediction["total"]["amount"]
    parsed_data["time"] = prediction["time"]["iso"]
    parsed_data["date"] = prediction["date"]["iso"]
    parsed_data["category"] = prediction["category"]["value"]
    return parsed_data

Now that our function is ready, we’ll just print the result in the console and add a simple check to ensure the API call was well performed and we can access the result. You can replace the main.py script to this:

Now that our function is ready, we’ll just print the result in the console and add a simple check to ensure the API call was well performed and we can access the result.

You can replace the main.py script to this:

import requests
def get_features(json_response):
    parsed_data = {}
    prediction = json_response["predictions"][0]
    parsed_data["total_amount"] = prediction["total"]["amount"]
    parsed_data["time"] = prediction["time"]["iso"]
    parsed_data["date"] = prediction["date"]["iso"]
    parsed_data["category"] = prediction["category"]["value"]
    return parsed_data

url = "https://api.mindee.net/products/expense_receipts/v2/predict"

with open("/path/to/my/file", "rb") as myfile:
    files = {"file": myfile}
    headers = {"X-Inferuser-Token": "my-token-here"}
    response = requests.post(url, files=files, headers=headers)

    if response.status_code != 200:
        print("Request error")
    else:
        json_response = response.json()
        features = get_features(json_response)
        print("Date:", features["date"])
        print("Time:", features["time"])
        print("Total amount:", features["total_amount"])
        print("Category:", features["category"])

Run the script and check out the results on your image.

Finally we are going to add a last piece of code that will highlight the features extracted on the image. It can help you or your users to very quickly validate the data extraction.

Highlight features on the image

Let’s try to highlight the features as if someone did it with a pen.

First, you’ll need to install the computer vision python library OpenCV if you don’t have it already installed in your env. To do so, run:

pip install opencv-python

We need to change a bit our get_features function to return coordinates for each feature, as we’re using this to know where to draw the rectangles.

def get_features(json_response):
    parsed_data = {}
    coordinates = []
    prediction = json_response["predictions"][0]
    parsed_data["total_amount"] = prediction["total"]["amount"]
    parsed_data["time"] = prediction["time"]["iso"]
    parsed_data["date"] = prediction["date"]["iso"]
    parsed_data["category"] = prediction["category"]["value"]
    coordinates.append(prediction["total"]["segmentation"]["bounding_box"])
    coordinates.append(prediction["time"]["segmentation"]["bounding_box"])
    coordinates.append(prediction["date"]["segmentation"]["bounding_box"])
    return parsed_data, coordinates

Once it’s done, we are going to create our highlighter function in different steps, as follows:

  1. Open the image from path
  2. Create a mask image
  3. Loop on each feature coordinates and draw the feature rectangle on our mask
  4. Overlay the mask and original image with alpha
  5. Display image to the user

Note: each coordinate returned by the API is relative (in % of the image). You’ll see there is a relative to absolute conversion in the code.

Here is the code step by step:

def highlight_features(img_path, coordinates):
    # step 1: Open the image from path
    cv_image = cv2.imread(img_path)

    # step 2: create mask image
    overlay = cv_image.copy()
    h, w = cv_image.shape[:2]

    # step 3: Loop on each feature coordinates and draw the feature rectangle on our mask
    for coord in coordinates:
        pt1 = (int(w*coord[0][0]), int(h*coord[0][1]))
        pt2 = (int(w*coord[2][0]), int(h*coord[2][1]))
        cv2.rectangle(overlay, pt1, pt2, (70, 230, 244), cv2.FILLED)

    # step 4: Overlay the mask and original image with alpha
    final_image = cv2.addWeighted(overlay, 0.5, cv_image, 0.5, 0)

    # step 5: Display image to the user
    cv2.imshow("highlghted_image", cv2.resize(final_image, (400, int(400*h/w))))
    cv2.waitKey(0)

Finally, we just have to modify a bit the code for executing the highlighting function and printing the results. Here is what the final code looks like:

import requests
import cv2
def get_features(json_response):
    parsed_data = {}
    coordinates = []
    prediction = json_response["predictions"][0]
    parsed_data["total_amount"] = prediction["total"]["amount"]
    parsed_data["time"] = prediction["time"]["iso"]
    parsed_data["date"] = prediction["date"]["iso"]
    parsed_data["category"] = prediction["category"]["value"]
    coordinates.append(prediction["total"]["segmentation"]["bounding_box"])
    coordinates.append(prediction["time"]["segmentation"]["bounding_box"])
    coordinates.append(prediction["date"]["segmentation"]["bounding_box"])
    return parsed_data, coordinates

def highlight_features(img_path, coordinates):
    # step 1: Open the image from path
    cv_image = cv2.imread(img_path)

    # step 2: create mask image
    overlay = cv_image.copy()
    h, w = cv_image.shape[:2]

    # step 3: Loop on each feature coordinates and draw the feature rectangle on our mask
    for coord in coordinates:
        pt1 = (int(w*coord[0][0]), int(h*coord[0][1]))
        pt2 = (int(w*coord[2][0]), int(h*coord[2][1]))
        cv2.rectangle(overlay, pt1, pt2, (70, 230, 244), cv2.FILLED)

    # step 4: Overlay the mask and original image with alpha
    final_image = cv2.addWeighted(overlay, 0.5, cv_image, 0.5, 0)

    # step 5: Display image to the user
    cv2.imshow("highlghted_image", cv2.resize(final_image, (400, int(400*h/w))))
    cv2.waitKey(0)

url = "https://api.mindee.net/products/expense_receipts/v2/predict"
with open("/path/to/my/file", "rb") as myfile:
    files = {"file": myfile}
    headers = {"X-Inferuser-Token": "my-token-here"}
    response = requests.post(url, files=files, headers=headers)

    if response.status_code != 200:
        print("Request error")
    else:
        json_response = response.json()
        features, coords = get_features(json_response)
        print("Date:", features["date"])
        print("Time:", features["time"])
        print("Total amount:", features["total_amount"])
        print("Category:", features["category"])
        highlight_features("path/to/my/file", coords)

In the last line of code, don’t forget to replace the placeholder path/to/my/file to your current image path.

And the final result!

Conclusion

In just over 1 second, a receipt was uploaded, the API extracted the receipt data, then the result was parsed and highlighted in the image. Cool right?

If you wanted to use this kind of script to display results to your users, i’d advice you to do the highlighting in the front-end application, as sending images back from your middleware is not the best option because of payload sizes. The other solution would be to store the final image using cv2.imwrite(…) but it would make your client download the result. To help you with client-side rendering for your images, you can check out our open source ReactJS SDK.

If you have questions, please reach out to us!

API
Mindee
Python
Receipts
logo Mindee

Schedule a meeting with one of our experts

Please provide the following information so we can connect you to the right teammate.

Oops! Something went wrong while submitting the form.