
.webp)
Table of Contents
Workflows often involve document processing. And sometimes, you need to classify those documents automatically in your software. One reason can be that your users upload a bunch of different data in a unique flow, or they upload a single pdf including many different documents. It can be very tricky to automate this depending on your use case.
In this article, we’ll show you how to build an accurate document classification API that fits exactly your needs. In minutes, you’ll get your API up and running and you’ll be able to process millions of documents synchronously.
Our use case
Let’s take an example where your users are uploading documents on a single endpoint of your backend, and you want to classify them into 5 categories:
- W9
- 1040 Forms
- Invoices
- Payslips
- Other
%252520(1).webp)
Once our API is trained, we’ll be able to launch specific workflows on those different types of documents.
Set up our document classification API
Create an account on our platform and sign in. You’ll land on our home page.
%252520(1).webp)
Click on the “Create a new API” button.
Fill out a few information about your API. Give it a name, a description, and a cover image if you want.
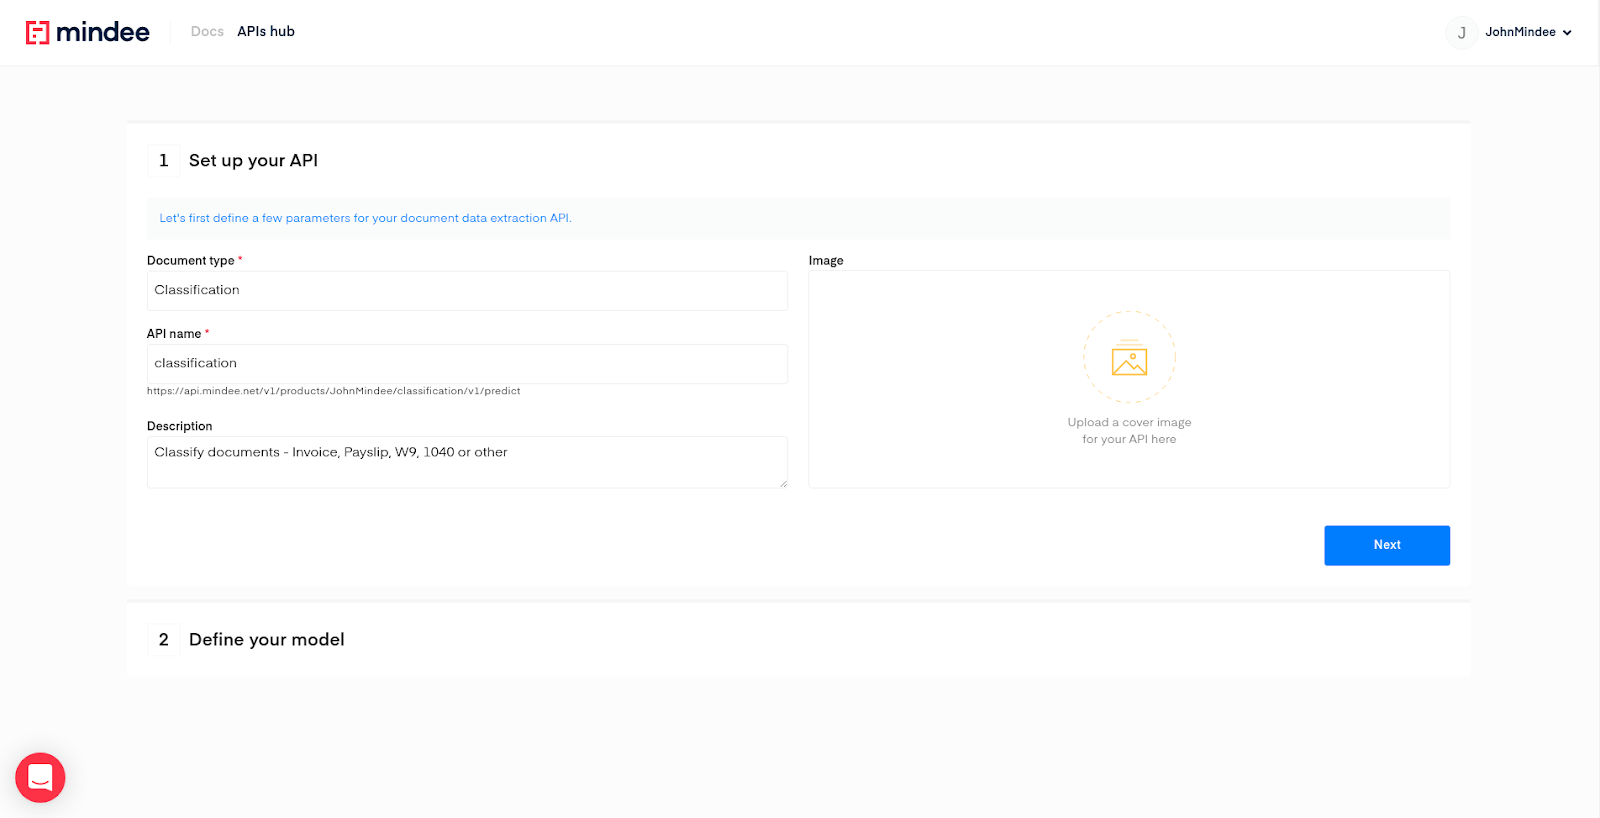
Then click on “Next”.
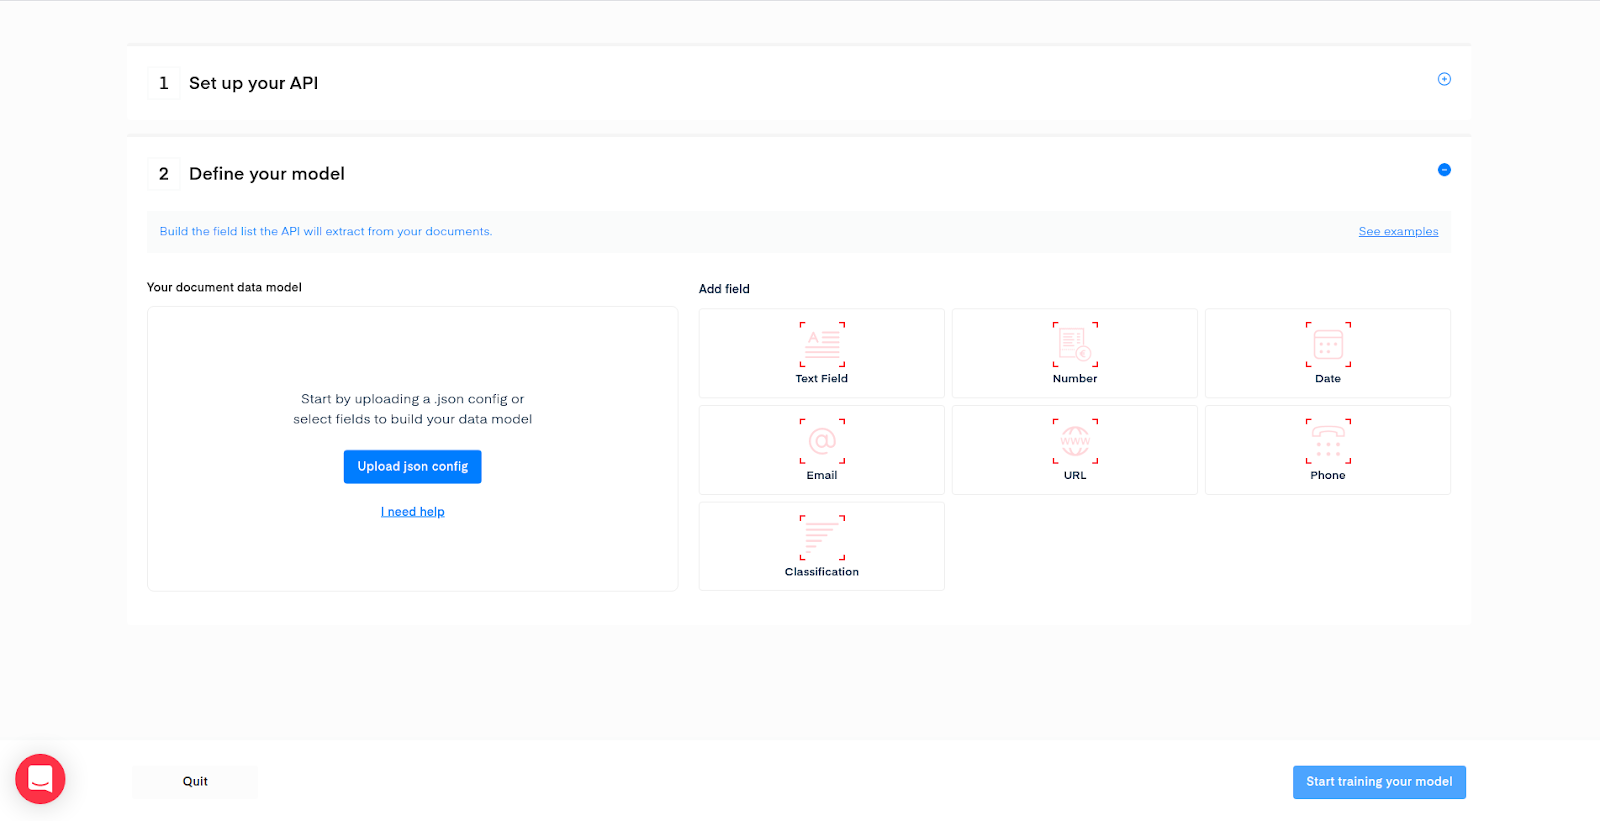
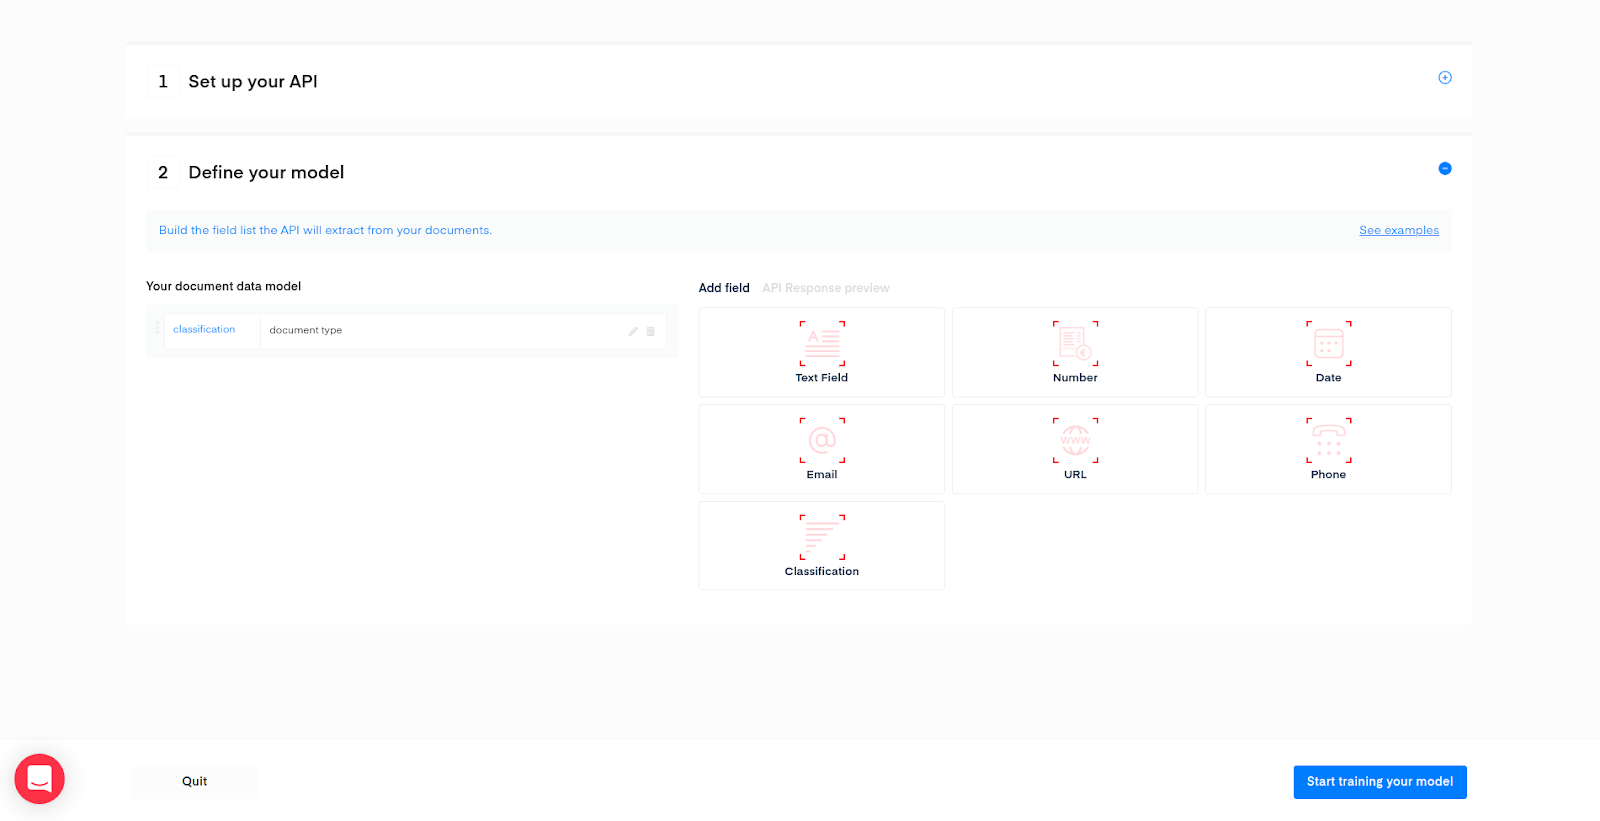
This is the step where you are going to define your classes. Add a Classification field:
A popup will show up, we need now to input our different possible classes. Let’s fill the form with the classes defined earlier.
%252520(1).webp)
Once you click the “Add this classification field” button, we are all set.
Click the “Start training your model” button.
Train your document classifier
Your API was just deployed! Now we need to train the model.
To do so, we’ll need data, 15 samples for each type should be enough to get very high performances, but it’s up to you to train with more if you want to. It’s going to take you no more than 10 minutes to annotate your data once it’s uploaded.
The training interface looks like this:

On the left part of the screen, you can upload images, pdf, or zip archives. If you have all your training data in a folder on your laptop, just zip it and drag and drop it on the upload interface. You can mix pdfs and images, it’s not a problem as our backend will take care of this.
Gathering your samples for training is actually the most boring part of the process.
In my example, I have a total of 90 data, equally distributed. As it’s a dummy example, I’ve put random documents for the “other” class, but in your real-world use case, it’s better to use real data from your flow that you’d consider as “other”.
My zip file is ready. When I drag and drop the file on the left part of the screen, the data management pane opens:
%252520(1).webp)
Each data will appear automatically in the pane when it’s ready for annotation.
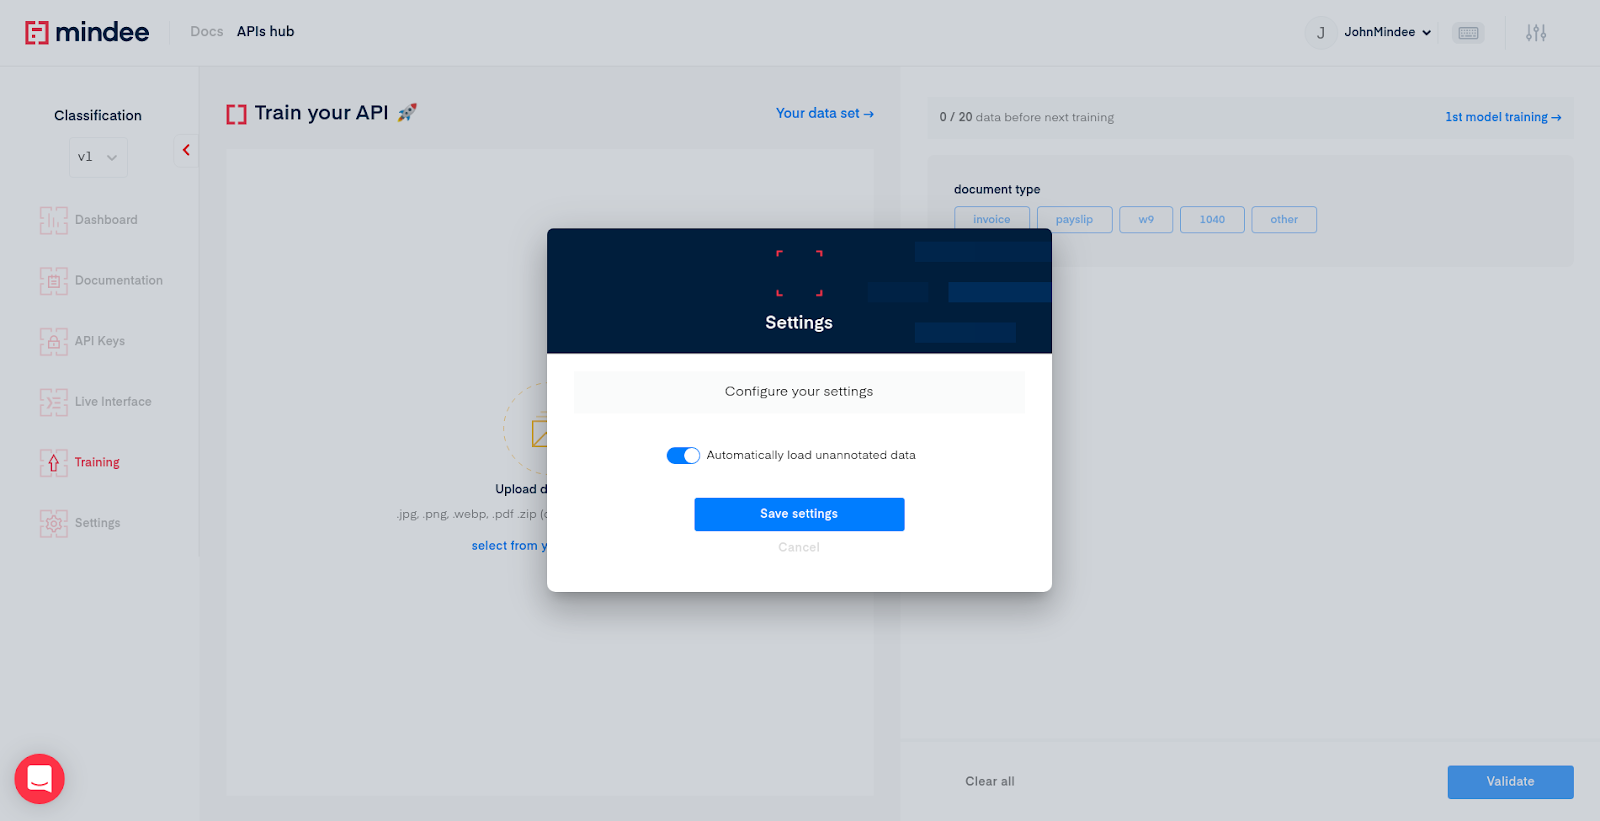
To make the annotation process easier, click on the setting icon in the header, and check the automatic data loading:
Let’s start annotating the data.
Click on “Your data set” on the left part of the screen, and click on the first document you see in the list.
%252520(1).webp)
Now, it’s very simple. Click on the desired class for each data on the right part of the interface:

Validate, and repeat.
It took me 4 minutes and 51 seconds to annotate my 89 data.
A model is trained every 20 data, and each of them is automatically deployed on your API under new versions:
- V1.0 = no model
- V1.1 = 1st model (20 data)
- V2.2 = 2nd model (40 data)
- …
You get an email when a model is deployed. My last model was deployed 15 minutes after I finished my 89 annotations. The first one was ready before I finished.
To know the performances or your model, ask the chat, we’ll give you the accuracy of your model. I got an overall accuracy of 96%, with confusion coming from invoices being classified as others. Adding a few more invoices and other documents would fix this.
Use the API
Once your first model is deployed you can test it right away with new data.
Hit the “Live interface” button on the sidebar, drag and drop a document. You should see something like this:
%252520(1).webp)
The latest version of your API (i.e the latest trained model) is automatically set for the live interface.
To integrate your API in your application, you can now hit the “Documentation” button in the sidebar.
There is everything you need to use the API:
%252520(1).webp)
- API Reference: base url, request body, headers and sample codes
- Response scheme
- Limitations: technical limitations in payload size, rate limit
- Open API: you can download the open API configuration to build your swagger collection, create automatically an SDK etc…
Conclusion
In under an hour, we’ve trained and deployed an API for classifying documents from 5 different classes. Either you have to process a few hundred documents per month, or tens of millions, you can safely use your API in your production environment. Our whole architecture scales automatically as the number of requests grows.
Feel free to contact us if you have any questions or if you just want to chat and understand how our algorithm works.


